Lesson#124: How to format text in excel with VBA

Another step towards learning VBA. In this post, we will learn to format text in excel with VBA.
In the previous post, I discussed changing the cell background color and color codes.
So we will start in a little advanced mode here. I am here taking an example of cell A1. I am going to show how to change the font, text color, text size, how to change bold, italic, underline, etc.
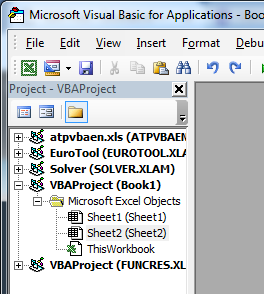
Ok then open the VBA editor by pressing Alt+F11 and then select and double click the sheet here.

Change background and text color
Now put code like this to change the background and text color.
Range(“A1”).Interior.color = vbGreen
Range(“A1”).Font.color = vbRed
End Sub
This will change the background color to vbGreen or RGB(0, 255, 0) and text color into vbRed or RGB(255, 0, 0).
Change text size
Now I will add another line to change the text size.
Range(“A1”).Interior.color = vbGreen
Range(“A1”).Font.color = vbRed
Range(“A1”).Font.Size = 24
End Sub
The size of text is changed in VBA in this way. I have changed into 24.
Change bold, italic, underline, etc.
Now I will add more lines to show you how to change the text to bold or italic and others.
Range(“A1”).Interior.color = vbGreen
Range(“A1”).Font.color = vbRed
Range(“A1”).Font.Size = 24
Range(“A1”).Font.Italic = True
Range(“A1”).Font.Bold = True
Range(“A1”).Font.Underline = True
Range(“A1”).Font.Strikethrough = True
End Sub
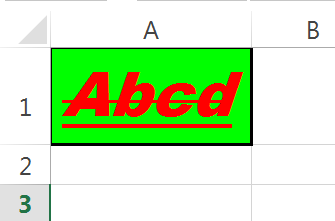
This has made the text bold, italic, underlined, and strikethrough.
Change font styles.
Now I will add one more line to show how to change the font style.
Range(“A1”).Interior.color = vbGreen
Range(“A1”).Font.color = vbRed
Range(“A1”).Font.Size = 24
Range(“A1”).Font.Italic = True
Range(“A1”).Font.Bold = True
Range(“A1”).Font.Underline = True
Range(“A1”).Font.Strikethrough = True
Range(“A1”).Font.Name = “Arial Black”
End Sub
I have changed to font style into Arial Black
Change cell border
This will show you how to change the cell border.
Range(“A1”).Interior.color = vbGreen
Range(“A1”).Font.color = vbRed
Range(“A1”).Font.Size = 24
Range(“A1”).Font.Italic = True
Range(“A1”).Font.Bold = True
Range(“A1”).Font.Underline = True
Range(“A1”).Font.Strikethrough = True
Range(“A1”).Font.Name = “Arial Black”
Range(“A1”).Borders.Weight = xlThick
End Sub
I have added a thick border so I used click
for a thin border, you have to replace it with xlThin
It finally looks like this.

So we have learned about text formatting in VBA. I hope you liked this post.
Leave a Reply