Lesson #9: VLOOKUP explained

In this post function, VLOOKUP is explained here once more with a very simple example.

VLOOKUP looks for the value in the leftmost column of a table. It means the lookup_value column should be placed on the right side of the array and It will lookup for the value in the leftmost columns of the array.
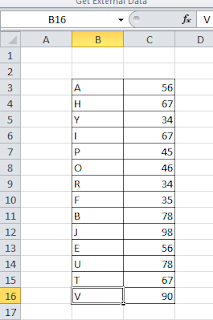
I have made a simple table for giving an example of VLOOKUP. Now, I have put alphabets in a column, and in another column against those alphabets, I have put some value. I will search the value against any alphabet with VLOOKUP.

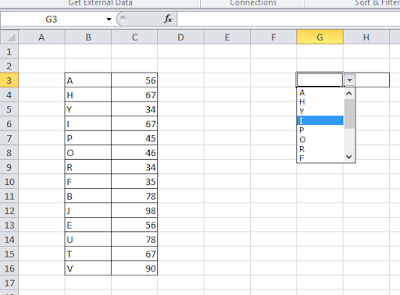
In a cell, I put data validation from the list of alphabets for which I will look for value.

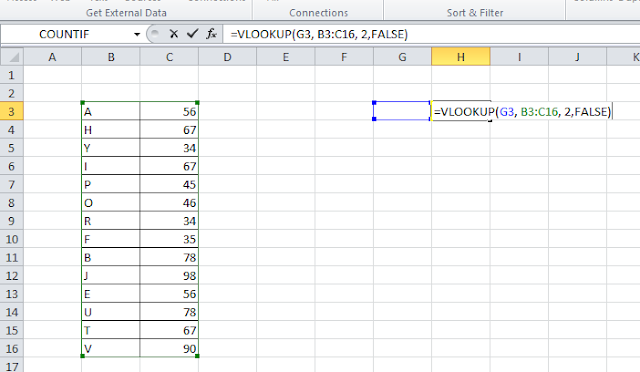
Now, In the above picture, I am showing how to use VLOOKUP. In the very next cell, I have put the formula =VLOOKUP(G3, B3:C16, 2, FALSE). Structure of VLOOKUP is =VLOOKUP(lookup_value, table_array, col_index_num, [range_lookup]). This function will lookup for the value in that cell where I specified it as lookup_value then It will search in the array for value in the leftmost columns of the lookup_value column, then it will return the result.

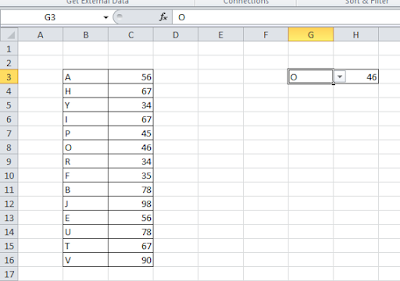
Here this function is showing the result. I hope you like my post. Don’t forget to comment and share it.
Related video tutorials:
Leave a Reply